How to Connect Wi Fi Unifi to Laptop
If you have a newer laptop, chances are it has Wi-Fi built in. If you’re not sure, look for a small wireless antenna on the side or back of your laptop. To connect to a Wi-Fi network, you need within range of a hotspot.
Hotspots can be found in many public places such as airports, coffee shops, and libraries. Once you’re in range of a hotspot, follow these instructions to connect to the Internet.
Cara cara Configure modem menggunakan Wifi Router Unifi
- Open the Settings app on your laptop
- Click the “Network & Internet” category
- Click the “Wi-Fi” option in the left sidebar
- Make sure the “Wi-Fi” toggle switch is set to “On” at the top of the right sidebar
- If it’s not, click it to turn on Wi-Fi on your laptop
- Scroll down to the bottom of the right sidebar and click the “Add a new network” option
- Enter your Unifi network SSID in the “Network name” field and click “Next
- ” 7 Choose your Unifi network security type from the list and enter your password in the corresponding field (if prompted)
- Click “Connect
Unifi Can’T Connect to This Network
If you’re having trouble connecting to a Unifi network, there are a few things you can try. First, check to make sure that the network is up and running. If it’s not, restart your router and try again.
If that doesn’t work, try resetting your Unifi device. To do this, hold down the reset button for 30 seconds while the device is powered on. Once the device has been reset, try connecting to the network again.
If you’re still having trouble, contact your ISP or Unifi support for further assistance.
Credit: www.youtube.com
How Do I Connect to Unifi Wifi?
Assuming you would like a step-by-step guide on how to connect to UniFi WIFI:
1. Download the UniFi app from the App Store (for iOS devices) or Google Play Store (for Android devices).
2. Once the app is installed, open it and tap “Create New Account” to create a UniFi account.
If you already have a UniFi account, skip this step and sign in with your existing credentials.
3. After creating an account or signing in, you will be prompted to add a controller. Tap “Add Controller” and then select “Scan QR Code” under the “Manual Setup” section.
4. Use your device’s camera to scan the QR code located on your controller. The controller will automatically be added to your account and appear in the app interface once it has been successfully scanned.
5. Now that you have added a controller, select it from the list of available controllers and tap “Connect To WiFi Network” under the “Network Settings” section.
6. Select the SSID of the network you wish to connect to and enter the password when prompted before tapping “Join” to complete the connection process.
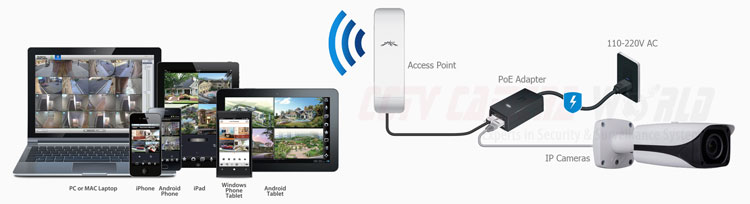
How Do I Connect to Unifi Devices?
It’s easy to connect to UniFi devices! All you need is the UniFi Controller software and a device that is connected to the same network as your UniFi devices. Once you have the controller software installed, simply open it and click on the Devices tab.
From there, you’ll see a list of all UniFi devices that are connected to your network. Simply click on one of the devices and you’ll be able to manage it from the controller software.
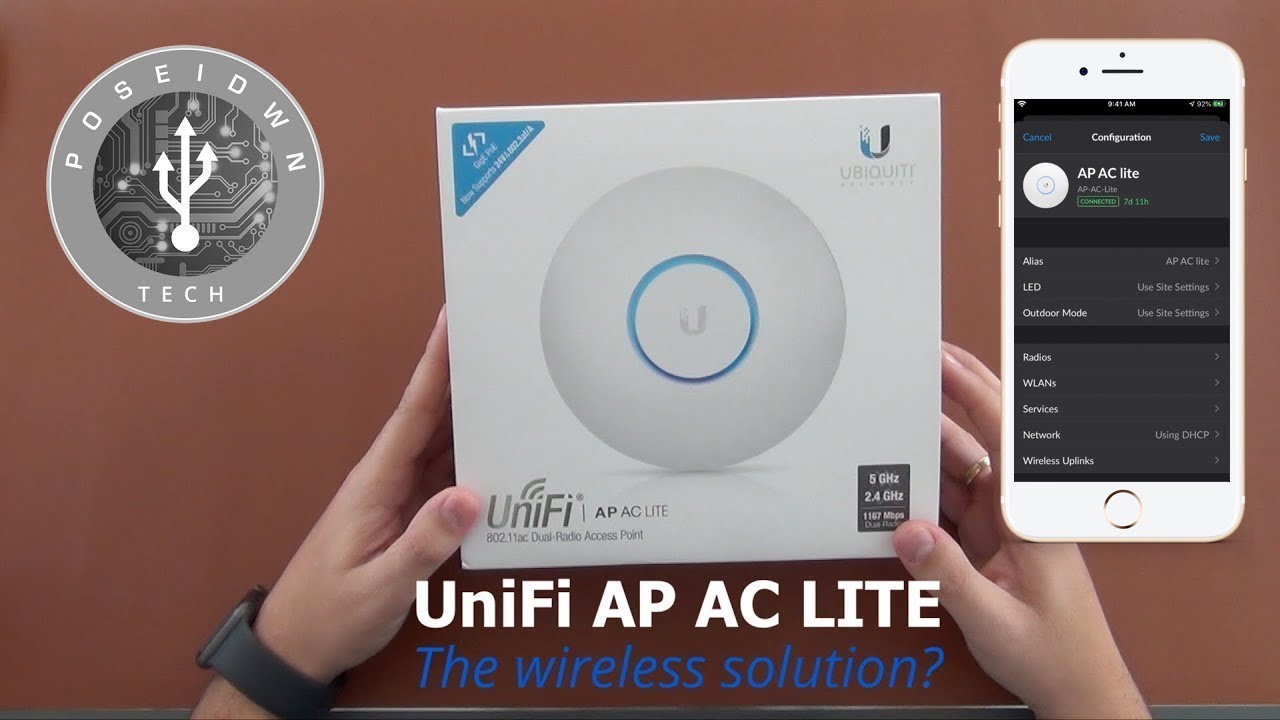
How Do I Setup My Unifi Wifi Extender?
Assuming you would like a step-by-step guide on how to set up a UniFi wifi extender:
1. The first thing you need to do is connect the power adapter to the extender. Once that is done, plug it into an outlet.
2. Next, connect the Ethernet cable from the port labeled “PoE” on the back of the extender to your router.
3. Once that is done, log into your UniFi controller and go to Settings>Site>Device and click Adopt next to your new device. This will add it to your network.
4. Now that the device has been adopted, go ahead and give it a name (this will help you identify it later). To do this, go to Configure>General>Name and type in the desired name for your device.
5. The next step is to configure your wireless settings.
To do this, go to Configure>Wireless Networks>(select network you want to extend)>Edit>. In the Wireless Network edit menu, change the SSID Name field to match the SSID of your main network exactly (case sensitive). Then, check off Enable Wireless Uplink so that devices connected wirelessly can communicate with each other regardless of which access point they are connected too (this is useful if you have more than one UniFi AP on your network).
After those changes have been made, click Save at the bottom of the page .
6. Now we need to tell our router where we want traffic from our extended network sent by creating what’s called a “port forward”. To do this, go back into Configure>Routers>(select router)>Edit Router>.
In Edit Router menu scroll down until you see Port Forwarding section and click Add New Port Forward Rule . A popup window will appear; in Service dropdown select All Services . For Source Address leave Any selected unless you only want specific devices forwarded then select Single Address and fill in IP address(es) under Source Address field below dropdown menus; for DestinationAddress select Single Address or Subnet depending if forwarding traffic for single device or group of devices then fill in IP address(es) under DestinationAddress field below dropdown menus; finally uncheck Enabled box then click Save .
Your new port forwarding rule should now appear in list below section just created; check Enabled box then click Save at bottom again .
How Do I Connect My Intel Laptop to Wifi?
Assuming you would like a step-by-step guide on how to connect your Intel laptop to WiFi:
1. Check if your WiFi is turned on. On most laptops, there will be a physical button or switch that turns the WiFi on or off.
2. Find the name of the network you want to join (this is also called the SSID). If it’s a hidden network, you’ll need to ask for the SSID from the network administrator.
3. Enter the password for the network (also called the WEP key or WPA passphrase).
If it’s a hidden network, you’ll need to ask for the password from the network administrator.
4 Windows will now try to connect to the network and if successful, will display “Connected” under the name of thenetwork.
Conclusion
Assuming you would like a summary of the blog post located at:
https://help.ubnt.com/hc/en-us/articles/220526784-UniFi-How-to-Connect-WiFi-to-Laptop
If you have a Unifi system and would like to connect your laptop to the Wi Fi, there are just a few steps you need to follow.
First, check that the Unifi controller is running and discoverable on your network. Then open up the WiFi network connections on your computer and look for the SSID (network name) of your Unifi system. Once you select that SSID, enter in the password for the wireless network and hit “connect”.
Now your laptop should be successfully connected to your Unifi system!